You can program the Xtron Pro on MacOS, Windows and Linux, follow the steps below to get started.
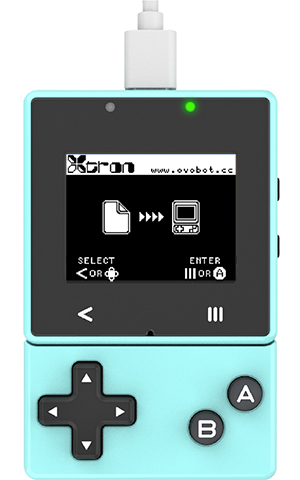
Step 1: Connnet your Xtron Pro to your Windows computer
If the Xtron Pro don't display interface below, Press reset button on Xtron Pro to restart and enter bootloader, there will be a XTRON drive on you computer.
Step 2: Program it on your Windows computer
you can use Microsoft MakeCode Arcade to develop games, or use XMaker to make clock, pedometer, IoT and Speech Recognition applications.
The Microsoft MakeCode Arcade Editor
The Microsoft MakeCode Arcade is a game editor using drag-and-drop blocks and JavaScript. Follow the example program below, there will be a duck on the Xtron Pro screen and falling down.
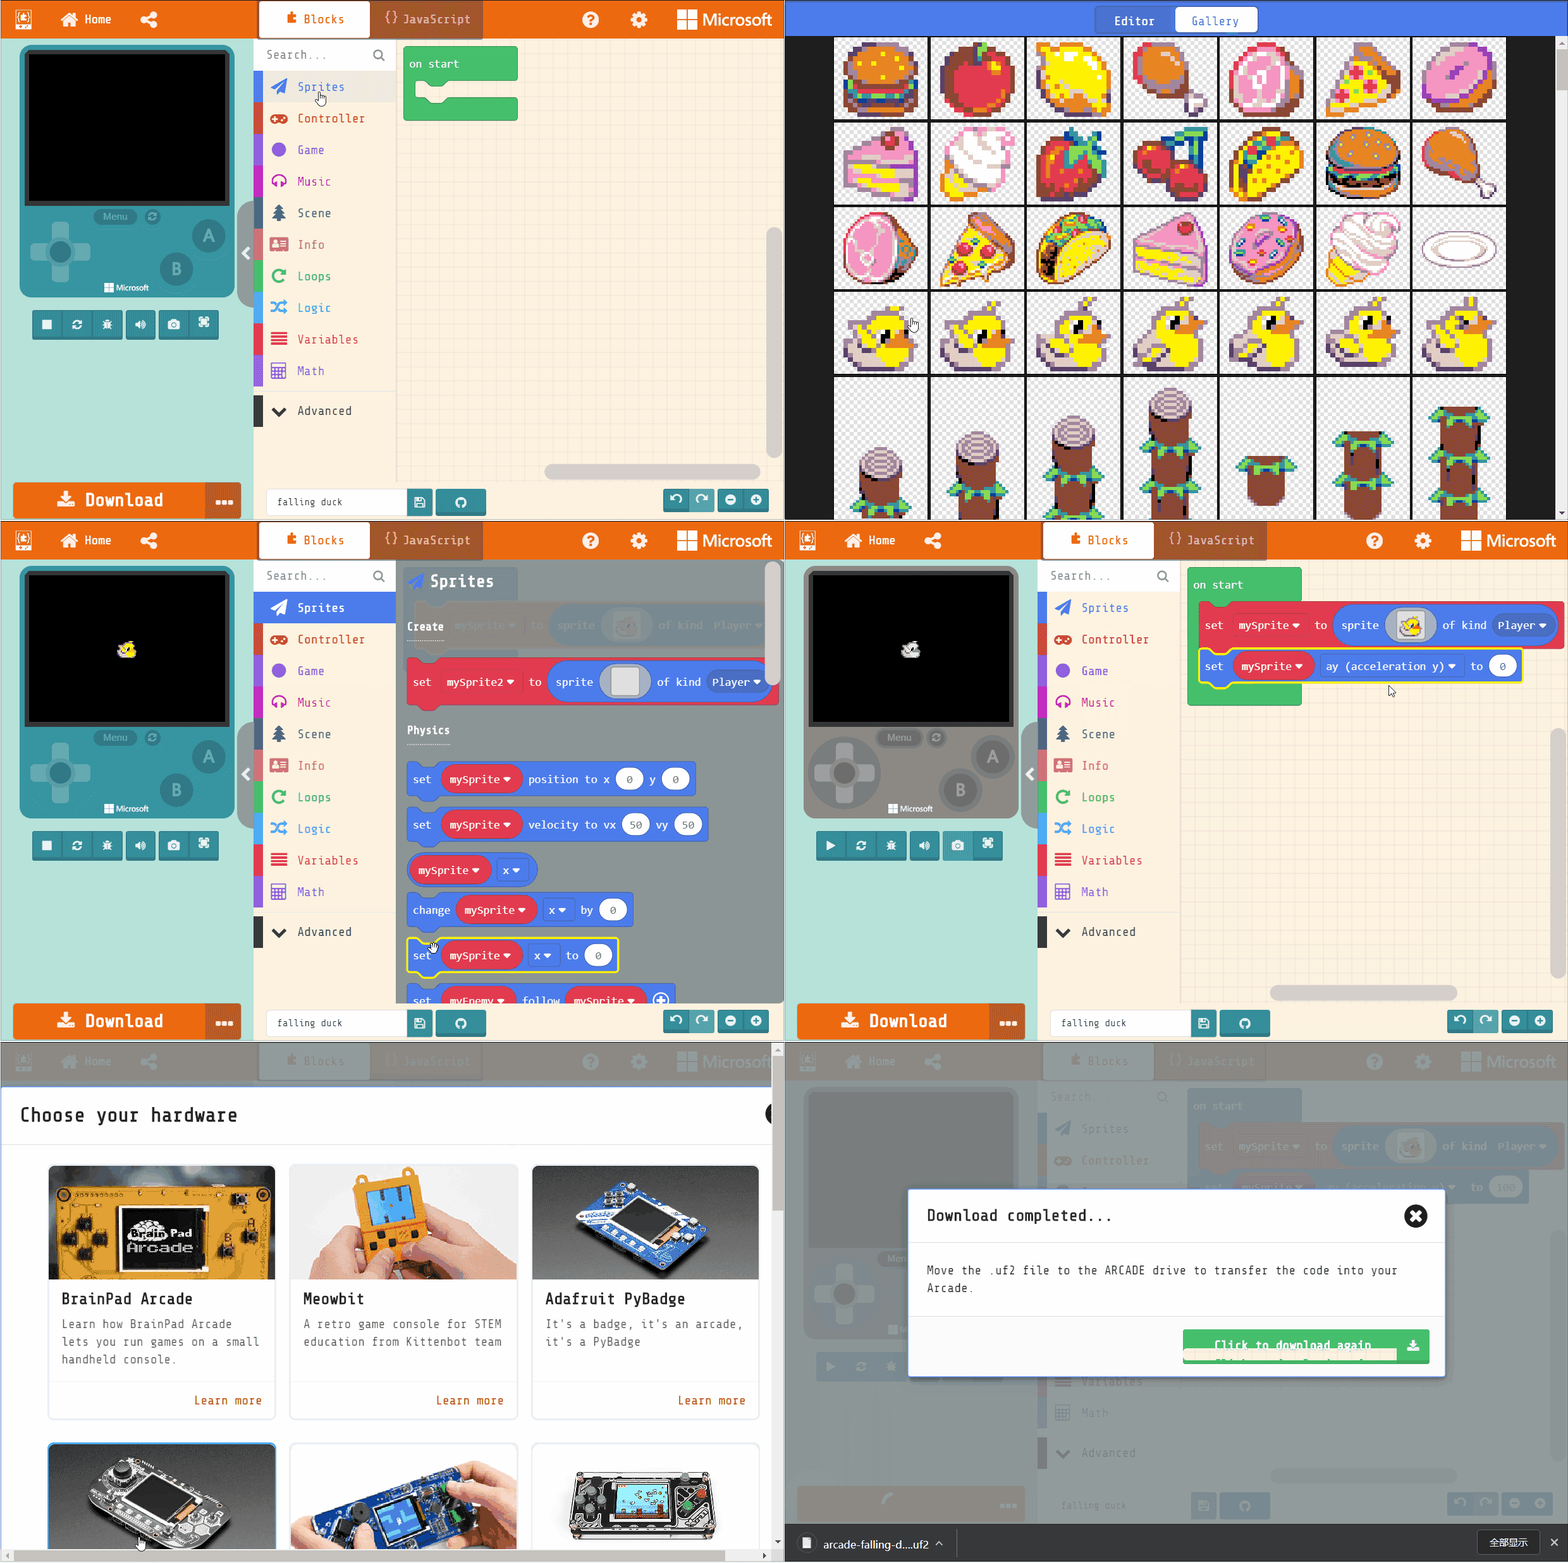 Let's Code
Step 3: Download the program file to your Xtron Pro
Click the Download button in the editor. This will download a 'uf2' file, which is a compact format of your program that your Xtron Pro can read. Once the uf2 file has downloaded, copy it to your Xtron Pro just like copying a file to a USB drive.

Flashing via WebUSB
Your browser supports WebUSB. This is a new technology that allows your web browser to directly interact with connected devices over USB, meaning that you don't need to download your uf2 file before flashing it to the Xtron Pro!
This feature is still in beta, meaning that it still needs a bit of testing.
On Windows you can right click the downloaded .uf2 file and choose "Send To→XTRON."
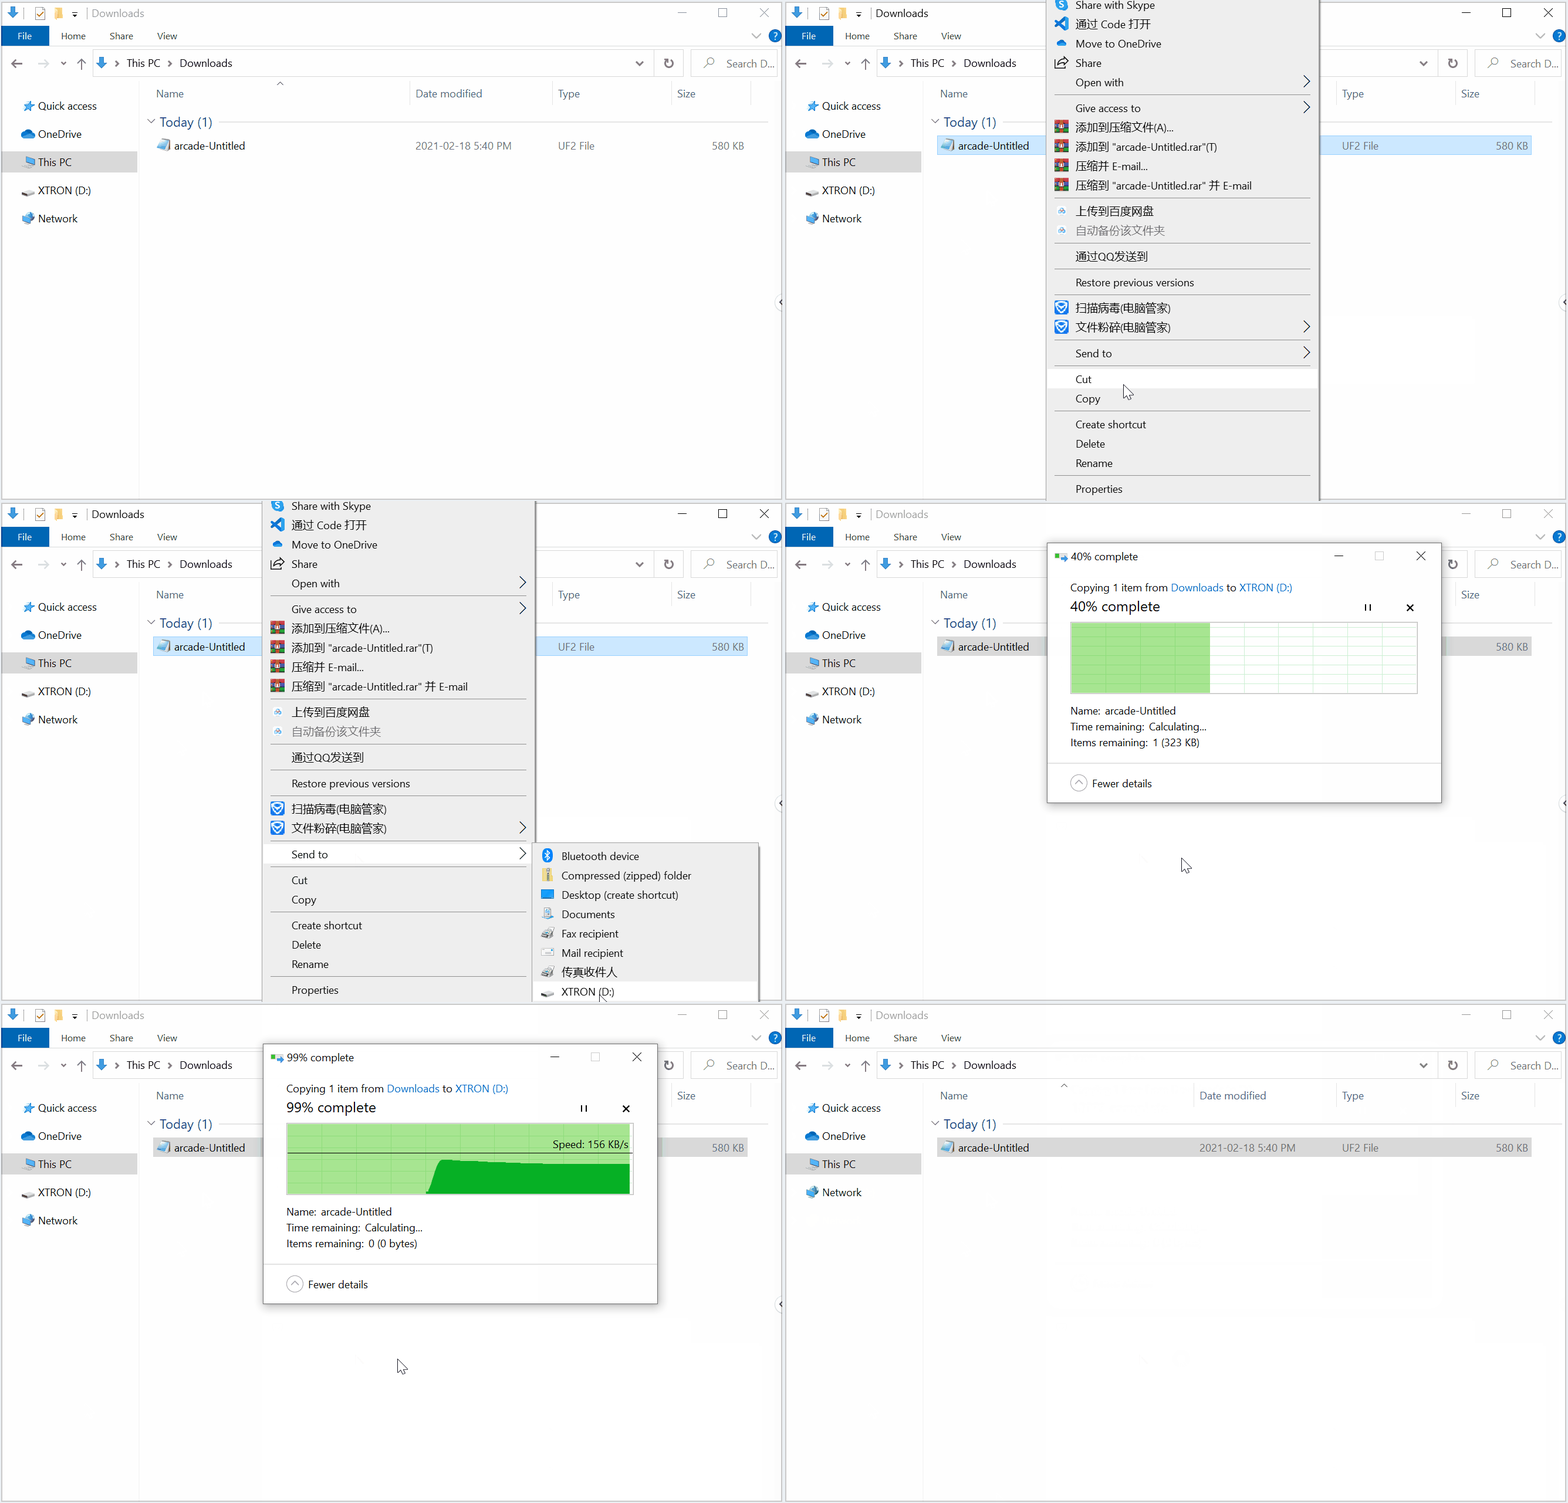
The Xtron drive will automatically eject each time you program it. The Xtron Pro can only receive uf2 files.
Step 4: Run it
The Xtron Pro will pause and the green LED will flash on the top of the Xtron Pro while your program is programming. Once the progress is finished the code will run automatically.
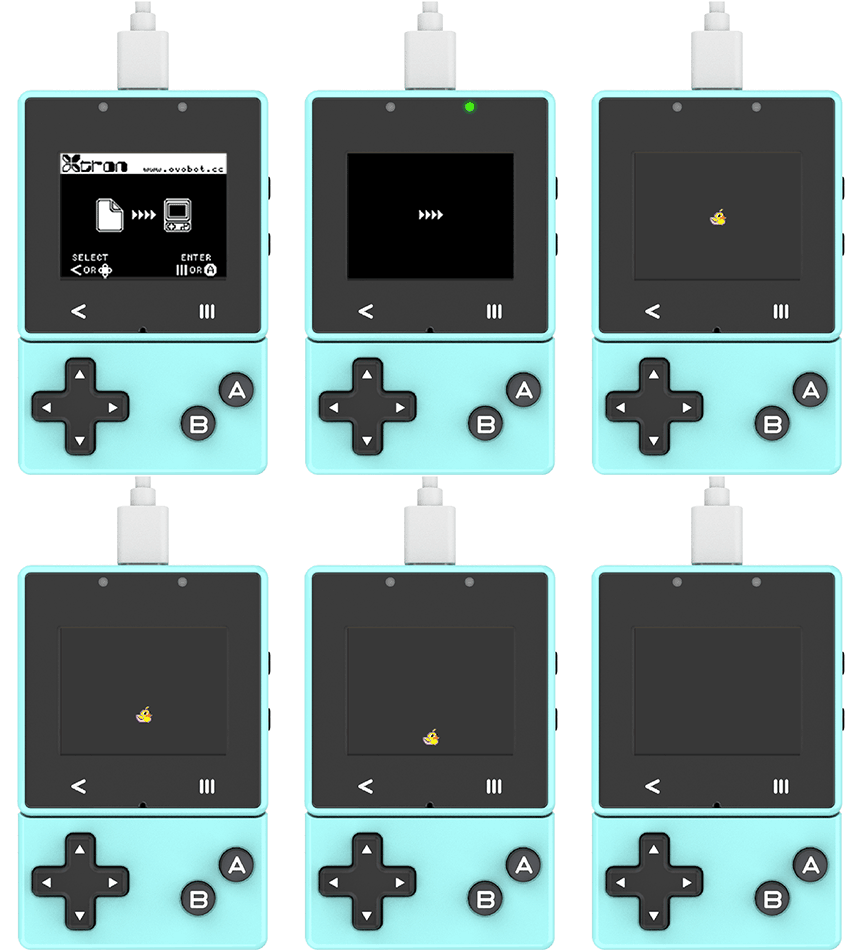
The Ovobot XMaker Editor
The Ovobot XMaker is a game and application editor using drag-and-drop blocks and JavaScript. Follow the example program below, we will develop a watch application.
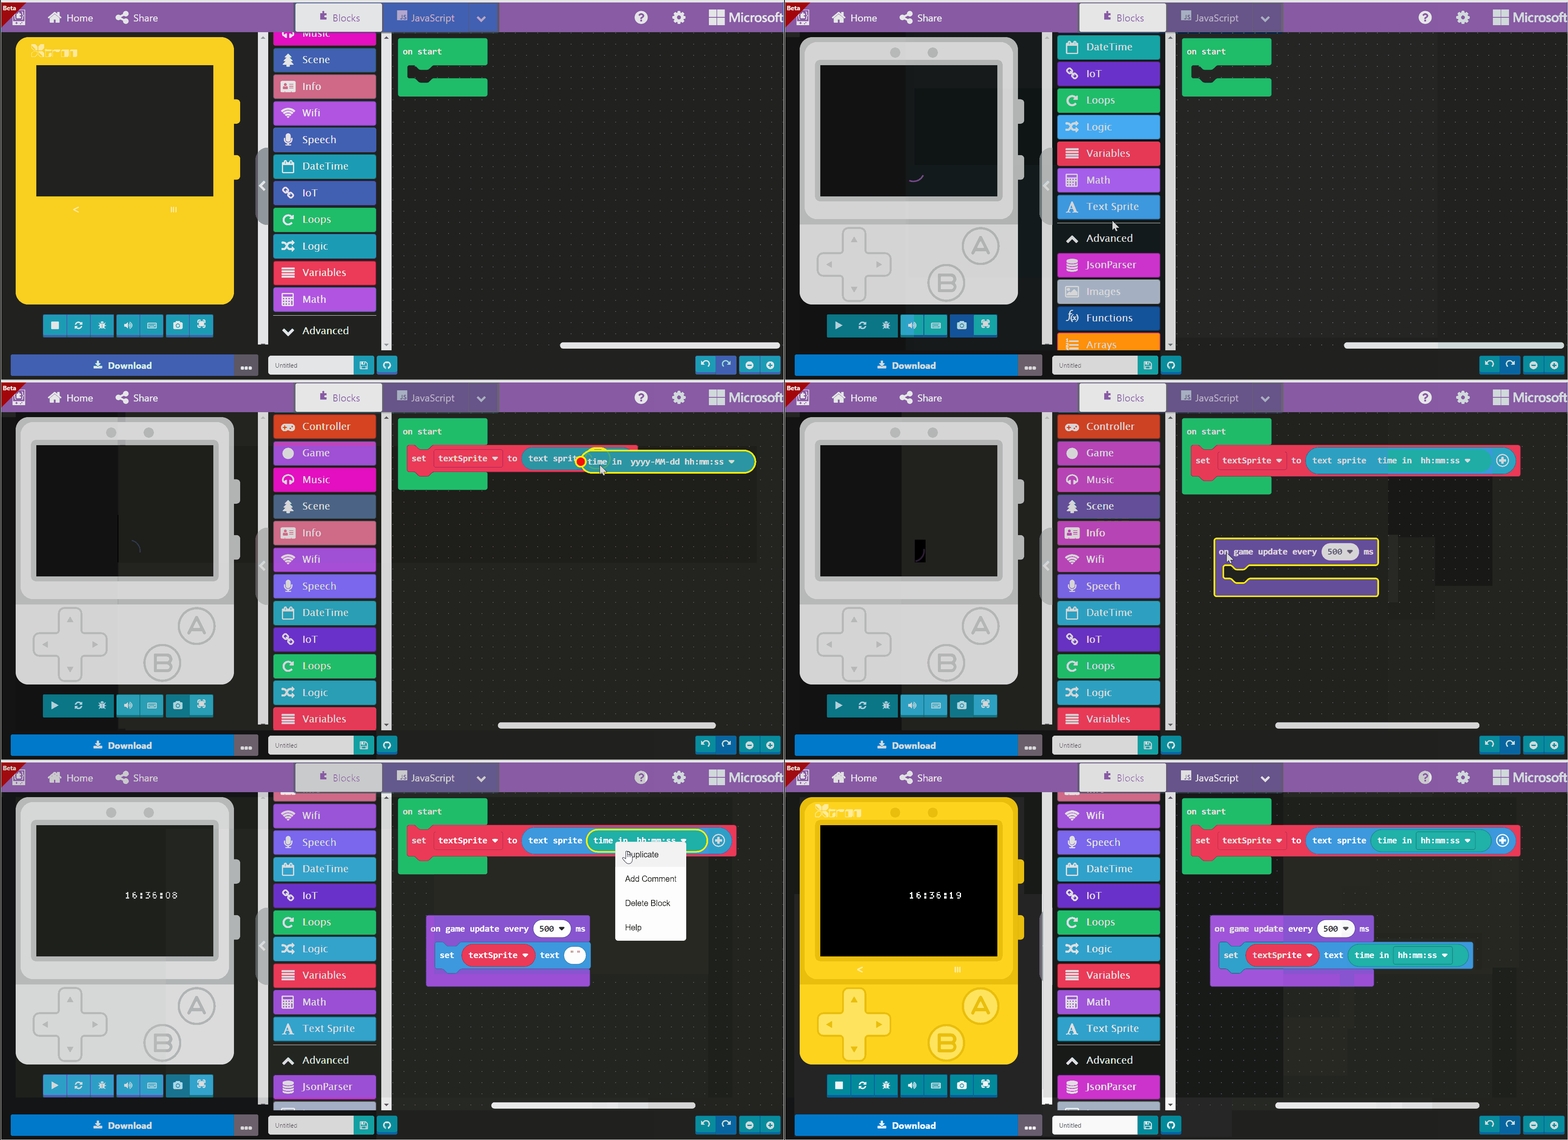 Let's Code
Step 3: Download the program file to your Xtron Pro
Click the Download button in the editor. This will download a 'uf2' file, which is a compact format of your program that your Xtron Pro can read. Once the uf2 file has downloaded, copy it to your Xtron Pro just like copying a file to a USB drive.

Flashing via WebUSB
Your browser supports WebUSB. This is a new technology that allows your web browser to directly interact with connected devices over USB, meaning that you don't need to download your uf2 file before flashing it to the Xtron Pro!
This feature is still in beta, meaning that it still needs a bit of testing.
On Windows you can right click the downloaded .uf2 file and choose "Send To→XTRON."

The Xtron drive will automatically eject each time you program it. The Xtron Pro can only receive uf2 files.
Step 4: Run it
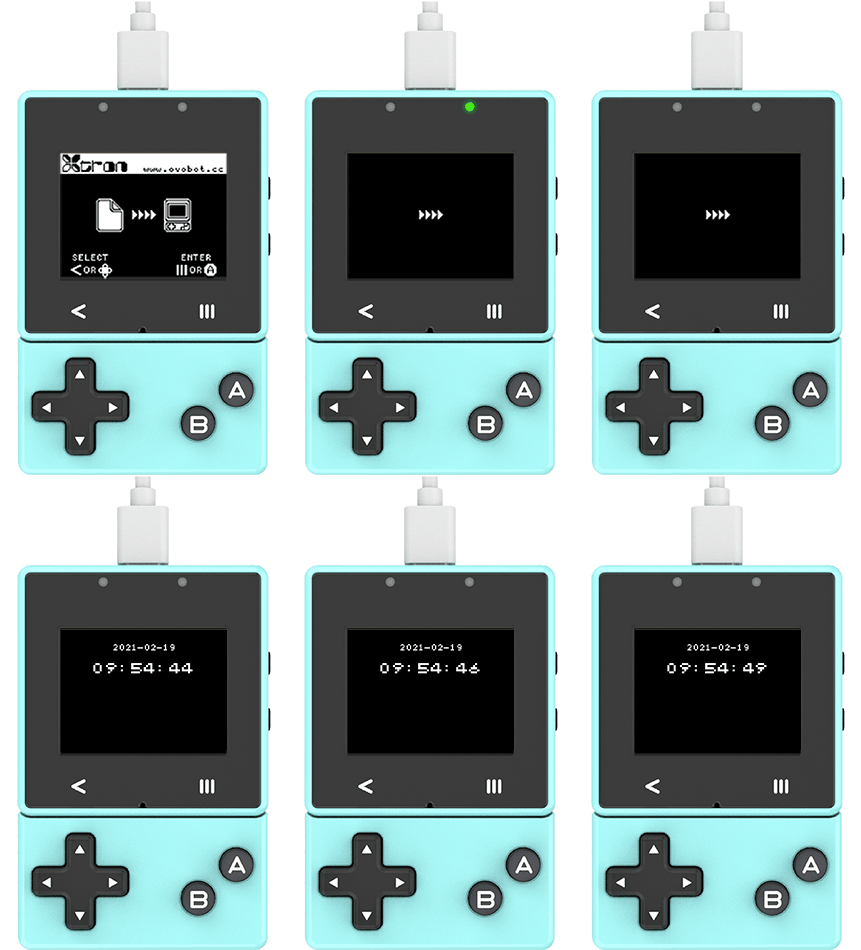
The Xtron Pro will pause and the green LED will flash on the top of the Xtron Pro while your program is programming. Once the progress is finished the code will run automatically.
Next
The page shows you how to get started with Xtron Pro, acctually you can make a lot of creations with it, from games to robots.
Comming soon
Comming soon


